How to install and setup Jenga Payment Gateway WooCommerce Plugin on your WordPress store

Finserve recently published Jenga Payment Gateway WooCommerce plugin to help WordPress merchants to integrate easily to their checkout platform. This plugin basically allows merchants to accept cards (Master Card, Amex and Visa Card), mobile money(Equitel, Airtel, Mpesa) and bank account payments from their customers in a simple and convenient way.
In this article, we will look at how easy it is to install and set up the Jenga Payment Gateway WooCommerce plugin to start receiving payments from your customers.
We have divided this article into the following 4 simple steps which will guide you on how to install, setup and get the plugin up and running on your WordPress store.
1.Sign Up for an account in Jenga HQ Portal
Jenga HQ portal will allow you to generate keys and credentials needed to configure the plugin settings in order for it to work.
The sign up process is pretty easy and straightforward. Just follow this link Jenga HQ Portal and click on the sign up label.
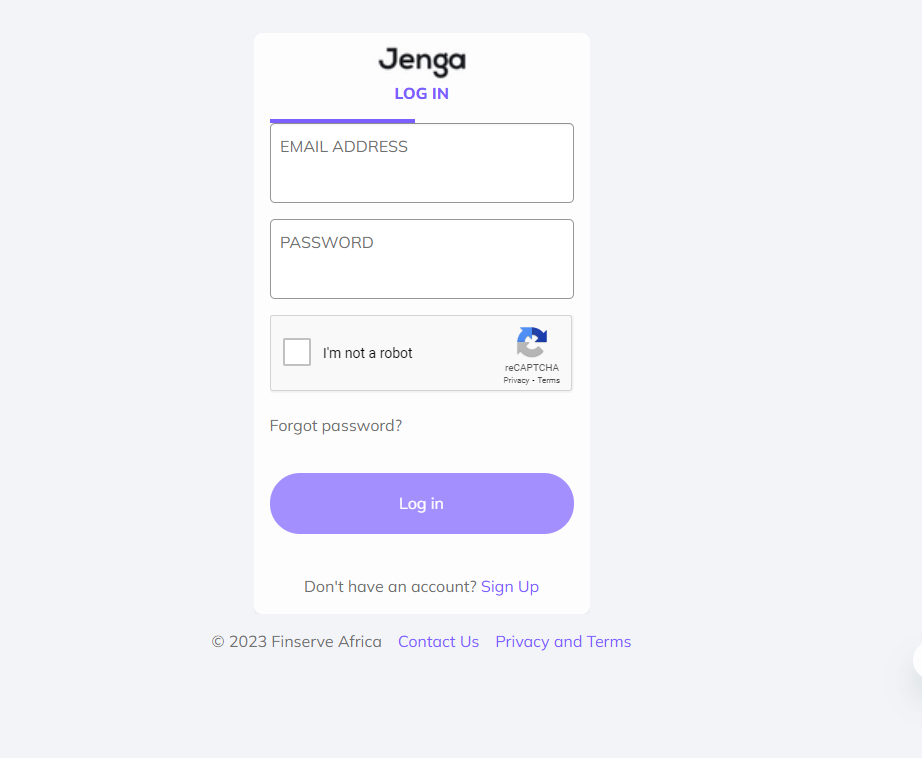
This will take you through the type form where you are required to supply your personal, business information and the Finserve Jenga product that you are interested in.
Once you submit these details, you will receive an email with your login credentials and link to the test portal.
2.Generate keys and credentials needed to set up the plugin
Proceed to login to the test Jenga HQ Portal with your credentials (email and password )and after login, click Wallets sub-menu under Settings and add wallets that you will use to receive payments from your customer.
After you successfully configured the wallets, click on the API Keys submenu which is under Settings Menu.
You will see two buttons; View Keys (used to view current keys and credentials) and generate New Keys (used to generate a new set of Keys and credentials).
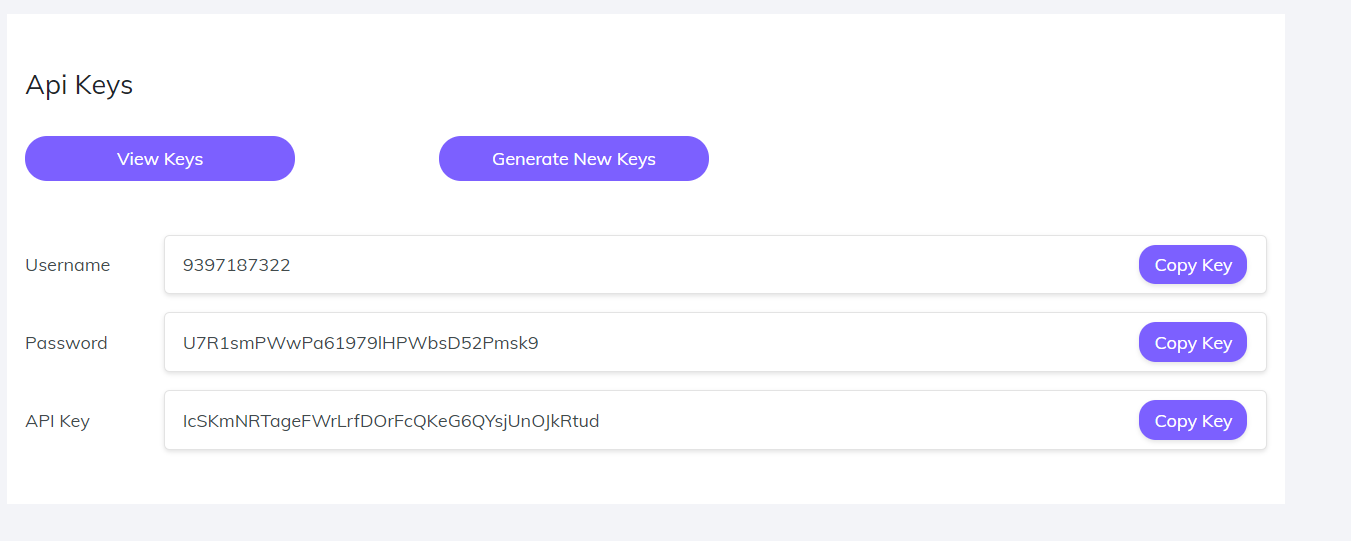
Click on view keys and copy the username, password and API Key and save them on your desired location. We will use this later to set up the plugin.
3.Install Jenga Payment Gateway WooCommerce plugins
Jenga Payment Gateway WooCommerce plugin is hosted on the WordPress store so the installation process involves Login into your WordPress admin area and following the simple steps below;
- Click the Plugins menu and select Add New from the left-hand menu
Type “Jenga Payment Gateway for WooCommerce” in the search box.
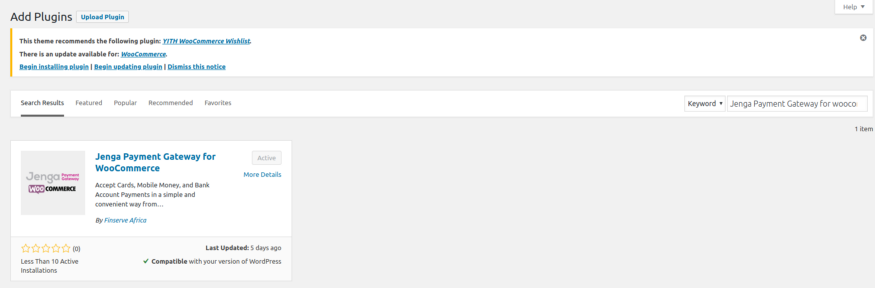
- From the search result, you will see Jenga Payment Gateway for WooCommerce, click on Install Now to install the plugin
- A popup window will ask you to confirm whether you wish to install the Plugin, click yes and after installation and activate the plugin.
- This will add a menu item on the left Admin menu area (Jenga PGW)
4.Configure the Plugin Settings and enable it as a payment option under WooCommerce
This Menu Item contains three submenu items namely; Jenga PGW, Transactions and the Settings menu.
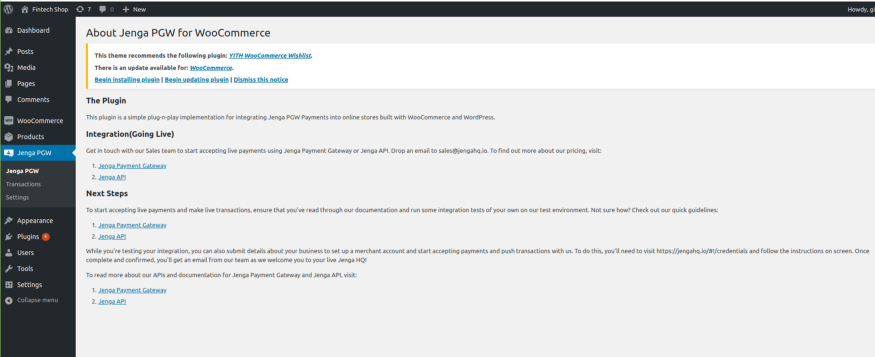
Jenga PGW Menu:
This submenu contains general information about the plugin and important information and links about getting started and going live.
Transactions Menu:
Shows a list of payment transactions and enables you to filter a payment transaction by the order reference number.
Settings Menu:
When you click on the settings submenu, it takes you to the WooCommerce payment settings where you need to fill the page with your specific settings as obtained in Jenga HQ Portal.
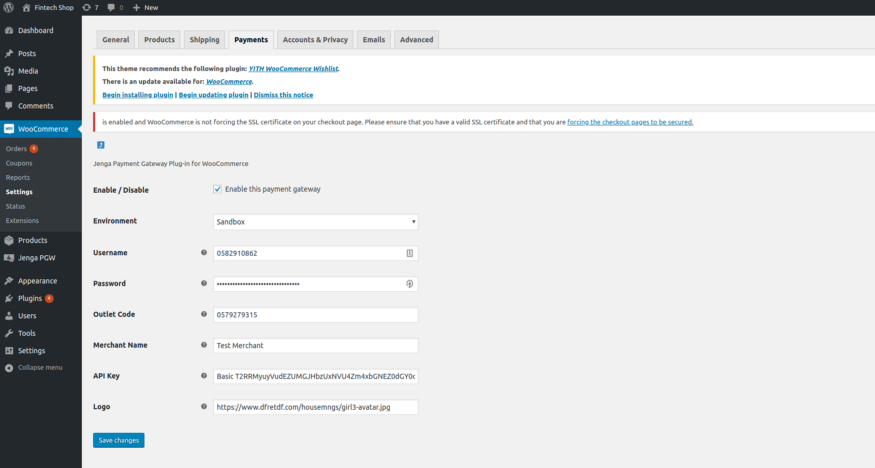
Make sure to tick the Enable / Disable checkbox to enable you to use this plugin as a payment Option under WooCommerce payments.
Sandbox is the default environment dropdown option which will enable you to test the plugin using test credentials.
To test the plugin in production mode, select it from the dropdown option and supply production credentials.
When you check under WooCommerce payment methods, this now should be enabled.
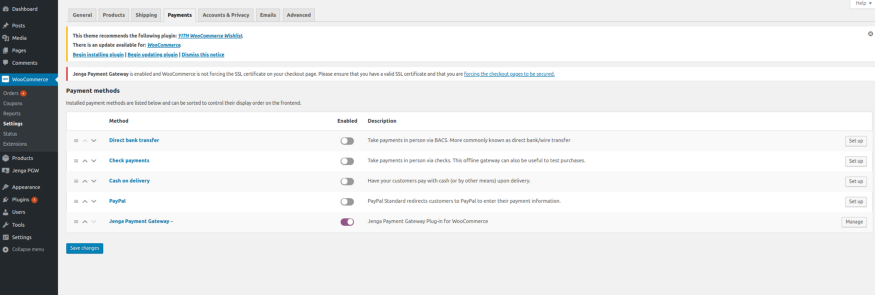
If you have followed these steps correctly up-to-the last step, your customers will now be able to see Jenga Payment Gateway as a payment option during the Checkout process.

Conclusion
Congratulations!! for making it this far. We just looked at how to install and setup Jenga WooCommerce Plugin on a WordPress store in 4 simple steps.
You should now be able to receive payments from your customers using multiple payment channels that are available in the market.
If you enjoyed reading this article feel free to clap, share and leave your feedback on your experience setting up this plugin and making it work on your WordPress store.
Feel free to reach out to us in case you get stuck or have ideas on how the plugin can be improved.